How to integrate Occulights with Microsoft Graph API
This guide walks you through the steps to register and configure an enterprise application in Azure Active Directory (Azure AD) for integrating Occulights with Microsoft Graph API.
Prerequisites
-
Azure Active Directory admin access
-
Occulights integration requirements (e.g., redirect URIs, required Graph API permissions)
-
Microsoft 365 tenant (or Azure AD environment)
Step 1: Log in to Azure portal
- Navigate to https://portal.azure.com.
- Sign in with your admin credentials.
Step 2: Register a new application
Go to Microsoft Entra ID.

-
Click "App registrations" from the left-hand menu.
-
Click "New registration".
-
Fill in the following details:
-
Name:
Occulights Integration(or any name you like) -
Supported account types: Choose the appropriate option ("Accounts in this organizational directory only").
-
Redirect URI: Choose "Web" and enter the URI provided by Occulights (e.g.,
https://occulights.com/oauth/callback)
-

5 Click "Register".
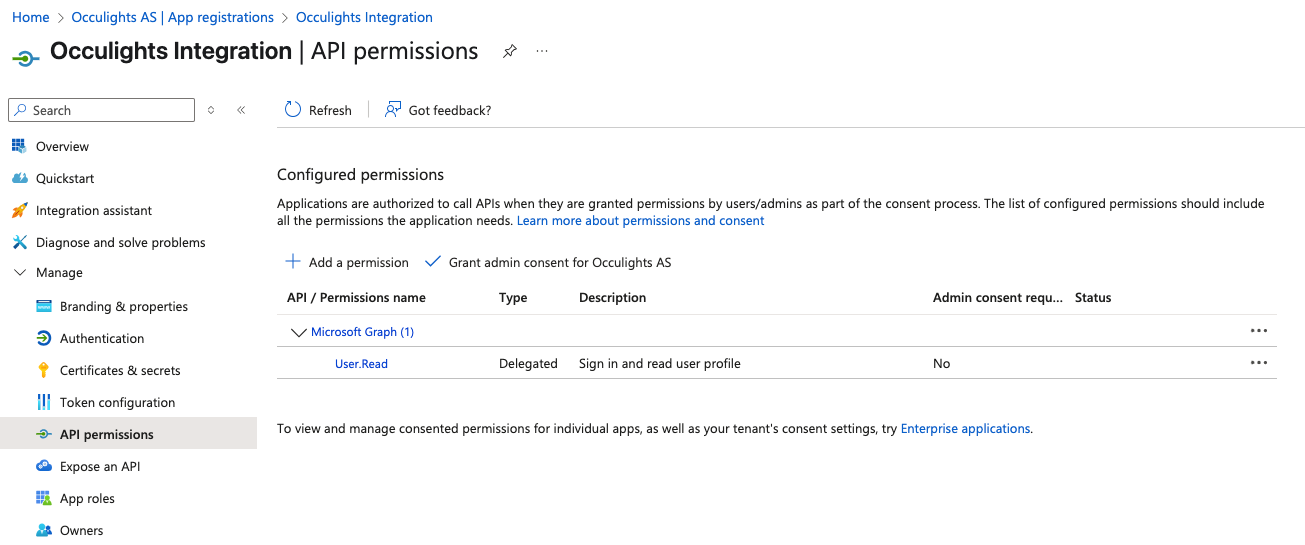
Step 3: Configure API permissions
-
After registration, go to the "Manage" tab.
-
Click "API Permissions".

3 Click "Add a permission".
4 Choose Microsoft Graph.

5 Select the type of permissions:
Application permissions
6 Add the permissions required by Occulights.
- Calendars.ReadWrite
- Users.Read

7 Click "Add permissions".
8. Click "Grant admin consent" for your organization.

Step 4: Create a client secret
- Go to the "Certificates & secrets" tab.
- Under Client secrets, click "New client secret".
- Add a description and choose an expiry period (e.g., 6 months, 12 months).

4 Click "Add".

5 Copy the secret value
Step 5: Collect app credentials
You will need the following details to complete the integration with Occulights:
-
Application (client) ID
-
Directory (tenant) ID
-
Client secret (just created)

Step 6: Log in and create the integration in Occulights
-
Navigate to https://app.occulights.com.
-
Sign in with your admin credentials.
- Go to "Integrations"
- Click on the "+" icon to create

5 Fill in the values from the previous step.

6. Done
